'Tron Tech Talk

Home Toronto - May '00 Philly - May '01 Toronto - Sep '01 MONEYPIT - Mar '03 MONEYPIT - Oct '03 MONEYPIT - Mar '04 MONEYPIT - Apr '04 MONEYPIT - May '04 MONEYPIT - Jul '04 Gatherings - Dec '04 MONEYPIT - Apr '05 MONYEPIT - May '05 MONEYPIT - Jun '05 MONEYPIT - Sum '05 MONEYPIT - Jan '06 MONEYPIT - Feb '06 MONEYPIT - Jun '06 MONEYPIT - Sep '06 MONEYPIT - Aug '07 MONEYPIT - Nov '07 MONEYPIT 2008 MONEYPIT - Sep '11 Mellotronists Mellotronia ...kl...'s Web ToC

Up

M4000
The Mellotron Book
Mellotron Links
'Tron Tech Talk
Mark I vs Mark II
'tronecdotes
Mellotron Myths
MA Tape Frames
Jimmy's FX Console
MusicMaster
Strobotron
EBay Mark II

'Tron Tech Talk

DISCLAIMER:  It's your machine.  If you decide to follow anything on this page, you assume full responsibility.  Some of these instructions may put your or your machine at risk, so don't do anything to your machine unless you are sure of what you are doing.  If in doubt, have someone check your machine out for you.

Mellotron hardware is "BA"--British Association.  It's not US, it's not metric.

The tools every 'tron owner needs---all demagnetized, of course:

bullet11/32" socket
bulletflat blade screwdriver

You may also want...

bulletHead demagnetizer
bullet11/32" open end wrench
bulletAs pure an alcohol as you can get (cleans anything)
bulletLight machine oil (I use Hammond oil)
bulletEmery cloth (takes the shine/edge off pinch rollers, use lightly, clean thoroughly)
bulletRubber cleaner/rejuvenator for pinch rollers (although we've yet to find the right one, Your Webmaster uses CAIG Rubber Rejuvenator)

...and

bulletStout  :-)

Some Technical Mellotron Tidbits including preventing your machine from spontaneously combusting, helping tapes fall, transporting a Mellotron, key adjustment hints, smoothing out wobblies, fixing a muffled note, getting rid of radio interference, adjusting pitch, demagnetizing the heads, and more!


THE M400 FIRE HAZARD

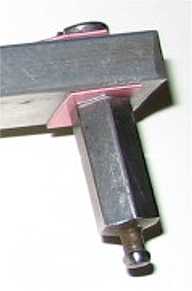
The original wiring for the on/off switch in the M400 means mains voltage is always available at the switch and is prior to the fuse. Should the switch fail, a dangerous short circuit and fire can occur. Mellotron Professor Jerry Korb has developed a simple but effective means to rewire the mains circuit in the M400 to prevent what you see in the above picture. The modification takes a few minutes to perform. Please contact Jerry for further information.


STICTION

What to do when the tapes won't fall...

There are two types of stiction:

  1. The most common kind is when the tapes don't rewind back all the way or they're sluggish to come back.  Sometimes tapping the key jiggles the tape enough so it falls back all the way.  The tape isn't hung up on anything---it's just sluggish.
  2. The type which is not so common is when the tape gets hung up in the tape box and won't come back out.  Sometimes there's a bend in the tape at the end, and there may even be a crease.  Make sure you've taken care of all the normal stiction problems in your machine first.  If this problem still happens, then it's more than likely the tape stock.  Replace with a more pliable stock of tapes, if you can.  Oh, by the way---the worst type of this stiction results in a tape wound 'round your capstan and snapped. Fortunately this is very rare.

Here are some things to check when a tape frame is exhibiting stiction.  Don't jump for the lubricant first (that's why it's waaaayyyy at the end of the list).  Try to find what's causing the stiction first.

bulletWhat is the condition of the tapes?  I had a misaligned pinch roller which forced the tape to squish to the side of the combs and develop a jagged edge.  This can stick on the comb (or the turnbuckle for that matter).  Sometimes tapes grow mold spots which can stick.  If a tape is creased, it may hang up in the mechanism as well.  Solution for a creased tape could be as simple as ironing it (not directly with the iron, of course...)
bulletDo you have your take-up box cover on?
bulletIs the tape path clear?
bulletIs the tape path perfectly straight front-to-back under the keys, including the take-up box?
bulletIs the felt at the lip of your take-up box in the way?  (Well...ummm...is it there in the first place...?)
bulletAre your tapes cut properly?  The tapes are cut to a specific width, but there is disagreement about how wide that is supposed to be.  So your tape stock may be wider or narrower, depending on where you got it.  The wider tapes could cause stiction.
bulletAre the tapes clean?  Any grubby residue on them?
bulletWhat's the weather?  Condensation on the tapes?  #805 hates hot humid days.
bulletAre the top wheels on your frame turning freely?
bulletDoes the pinch roller lift up all the way when you release the keys? 
bulletDoes the pressure pad lift up all the way when you release the keys?
bulletAre your tapes too long?  Tapes which are too long have insufficient spring tension when they are at rest.  So when you play a short note, the spring doesn't get stretched enough to reliably return the tapes.  Solution is to pull up some slack in the tapes.
bulletAre your tape frame springs worn out? 
bulletIs the tape frame aligned to the combs?  Does each tape come up from the column in the center, or are they squished against or rubbing either side of the column or the column separator pin?
bulletIs the tape frame square?
bulletAre the column separators evenly spaced?  If you bang your frame around a little, the pins on either end could get bent.  Gently bend them back.
bulletDoes the tape stock agree with your machine?  As we all know from Adventures in the Merbler Triangle, different Mellotrons handle different types of tape stock in different ways.  My #805 can play the "pink" stuff, the "piss yellow" stuff, and everything else you throw at it.
bulletIs your turnbuckle dirty?
bulletDoes your turnbuckle need some lubrication?  As a last resort, clean the turnbuckle and hit it up with some lube and allow it to dry completely.  In the UK Streetly uses a product called "Cockpit Shine."  In the US we used PYROIL at the Philly Symposium.  It is a Multi-Purpose Silicone Lubricant (non-petroleum based) made by Valvoline, and it's available at any auto parts store.  Mike "Bodger" Rivers adds:  Folks tried two products, the PYROIL and one other product, and they tested it on a styrene box lid.  One lubricant fogged the plastic---very bad.  The Valvoline version (PYROIL) flashed off immediately and left no odor afterward (desirable) and only an invisible slippery layer of silicone.  It didn't damage the material the turnbuckles are made from.  The Valvoline stuff uses Heptane as an excipient for the silicone. Heptane is a low density, high vapor pressure aromatic hydocarbon (close cousin to Hexane). The stuff you don't want will usually be labeled "Contains Petroleum Distillates" and will have a heavier oily smell like paint thinner.
Martin Smith suggests:
 Wipe the turnbuckle with a cloth bearing the substance and allow the lubricant to evaporate before you reinsert the tape loops and close up.  Failure to do this will allow the lubricant to migrate to the oxide face and then you are really scuppered.

...with thanks to Martin Smith, Frank Samagaio, and Mike Rivers.


TRANSPORTING A MELLOTRON

Some suggestions from Mellotron Professor Jerry Korb for when you go to move around your M400:

1) Slacken the drive belt from flywheel.
2) Reinforce assembly under motor/flywheel end with shim block to restrict any possible movement.
3) Place corrugated bits between each end of keyboard and headblock to prevent lateral movement of headblock.
4) Use cable ties to secure the track-selector pin
5) Remove the keyboard entirely. The heavier the instrument, the easier any shock tends to distribute through the innards.

Your Humble Webmaster would add...

6) Remove tapes/frame.
7) Transport in a Protect-O-Muff or road case, if you have that option.


KEY ADJUSTMENT

Fixing minor wobblies or dropouts:  One method of adjusting keys

DISCLAIMER:  Ken Leonard here...Below are instructions I cooked up out of my head.  They are not necessarily the ones that you use, although they're probably close.  This results in a very light adjustment, so keep that screwdriver handy, as you'll have to make minor adjustments until you get everything right.  I have also included the standard instructions.  Please do what is comfortable for you and best for your machine.

If there's a key that won't stay in tune or varies in pitch, you have a "wobbly".  This is caused by the tape not being drawn through the machine at a constant speed.  It could be because the pinch roller isn't adjusted right or is worn/stiff/dirty or not rolling, the capstan has a nick in it or is dirty, the pressure pad is too tight, or the tape is having trouble somewhere else in the tape path.

If the tape sound drops out or goes muffled then clear then muffled, you have a "dropout".  One cause of this is the pressure pad not contacting the tape head sufficiently due to a bad adjustment or due to the pinch roller being cranked down too far.

For this exercise we'll assume that all you have is a pinch roller or pressure pad adjustment that's not quite right.  We'll not deal with what to do with a bad pinch roller or how to adjust a pressure pad arm itself under the key---we'll just do the basic key adjustment here and assume everything else is OK, got that?


First, find the dodgy key---the one that isn't quite right.

The front adjustment screw on top of the keys is the pressure pad for the tape head, the rear adjustment screw is for the pinch roller to draw the tape through.

Basics

The biggest piece of advice I can give is if you're starting to crank everything down tight, something is wrong.  Back out your adjustment screws and start over!

Adjusting keys on a Mellotron is give and take.  Because the pressure pad and pinch roller adjustments are on the same piece of wood, adjusting one affects the other.  If you crank down on the pinch roller, the pressure pad is forced up.  You can very easily find yourself cranking everything down--but don't, just start over.  If keys are hard to press down in your Mellotron, you likely have things cranked down too far.

Minor adjustment...

Let's say you have a pretty well adjusted keyboard and one key needs a tweak.  Maybe you put in a new tape frame with different tape stock and have one or two keys that are wobbling or dropping out.

  1. If a wobbly, try loosening up the pressure pad a little.  If that doesn't work, put it back to where it was and tighten the pinch roller maybe 1/4 to 1/2 a turn.  If this causes a dropout, adjust for that.

  2. If a dropout, try loosening up the pinch roller adjustment a little.  If that doesn't work or causes a wobbly, put it back to where it was and try tightening the pressure pad adjustment 1/4 to 1/2 a turn or so.  If this causes a wobbly, adjust for that.

  3. Repeat this process--crank down a little on one or up on the other, maybe crank down on both a little, etc, until the key is happy.  It is a give-and-take process where you try to keep things as light as possible (not cranked down) but you want things to sound good.

  4. If you find that you are tightening both adjustment screws like mad and are starting to really crank down, it's time to restart from scratch.

Starting from scratch...

If you're cranking stuff down and are going nuts, start from scratch.  These are my instructions; shorter/easier "Standard instructions" are below (they're very similar, actually).

  1. Back off the pressure pad so you no longer hear anything when you press the key, then give it a few more turns back off
  2. Back off the pinch roller adjustment so when you press the key the tape is just being caught and can be drawn through
  3. Press down the key, and crank down the pressure pad until you hear a muffled sound, even if it's really wobbly
  4. If it's really wobbly or the tape won't pull, crank down the pinch roller screw a little more so the tape is more even (not perfect, but so you can hear stuff)
  5. Turn the pressure pad screw a little more until the sound is clear, then give it 1/2 turn.  This is the initial adjustment.
  6. Now go to the pinch roller screw and adjust it so the tape is being drawn through at just about full speed, maybe with a slight wobbly or two.  Give it 1 + 1/2 turns.  This is the initial adjustment for the pressure pad.
  7. Now try to play the tape all the way to the end.  Try different tracks on the tape.
  8. If you notice that the sound is wobbly, give the pinch roller screw another 1/4 to 1/2 turn or so.
  9. If you notice that the sound is muffled or drops out, give the pressure pad a 1/4 to 1/2 turn or so.
  10. If the sound goes wobbly again, try backing off the pressure pad first.  If that doesn't work, put the pressure pad back and crank the pinch roller down a little.  If you crank down the pinch roller and the sound begins to drop out, you may need to adjust the pressure pad a little again.  Essentially follow the "Minor adjustment" section above.
  11. If at any time you're cranking it way down, please restart.

OK, sometimes restarting from scratch won't work and you will need to really crank something down.  But more often than not it's indicative of another problem, such as a roller gone bad or some other Mellotron malady.  These instructions don't apply to that; you will need to have your machine looked at.

Standard instructions...

Below are the standard instructions when you want to start from scratch.

  1. Start with the pressure pad adjusted very light; it's OK if you can't hear it right away.
  2. Get the tape pulling steadily through the machine by having the pinch roller adjusted down just far enough.
  3. Adjust the pressure pad.  Crank down until you get a muffled sound then full volume (it will go from muffled to full volume in about 1/4 turn), then give 1 turn.
  4. Adjust the pinch roller to full speed (no wobblies), then give 2 turns.

These are much shorter instructions and will surely work in many situations.  They don't allow for the "tweaking" for every key, which will be different, and they start the pinch roller somewhat cranked down, which increases wear.  So I like to start light and adjust down if needed.  That's the way I do it.  You can do things the way that work for you!


STILL WOBBLY?  LOOSEN A STUBBORN PINCH ROLLER

If you can't fix a wobbly, check your pinch roller.  Remove the keyboard, turn it over, and try to spin the suspect pinch roller.  If it's not spinning freely, consider replacing it at some point (Streetly and Mellotron Archives can help).  But for now let's see if we can get it spinning OK to make it useful.

Ken Merbler came up with the "Merbler Flick" to do this, and it's clever, and it works in many cases (but not all). 

  1. Remove the pinch roller from the machine.  Remove the key retention bar, now remove the nylock nut at the back end of the key.  Remove the key and flip it over.  The pinch roller bracket is held in by two wood screws.  Remove those, and you will have the pinch roller attached to its bracket.
  2. Pour alcohol into a dish or cup deep enough to be able to dunk the pinch roller up to its axle in alcohol.  Spin the pinch roller to get the axle and bearing soaked.  Note:  Alcohol does damage to the rubber in the pinch roller, which is why this is more or less a "last resort" for a pinch roller that isn't working well anyway.  Water-based cleaners (like Windex or 409) may work and are more highly recommended for pinch rollers, but I haven't tried these.
  3. Remove the pinch roller from its bath, and now press your thumb against the pinch roller tightly and flick it as if you're trying to snap your fingers (it's a motion similar to that).  Many times the pinch roller will loosen right up and spin like crazy the first or second time.
  4. If the pinch roller doesn't loosen up, repeat the bath and flicking.  If this doesn't work, you may need to get a new pinch roller.
  5. A step I do is to then check the pinch roller out, maybe sand down the edges and scuff it a little, then apply a rubber rejuvenator.
  6. Put the pinch roller back onto the key and fasten the assembly back into the machine.  Put the retention bar back on, adjust the key height, and adjust the pressure pad and pinch roller.  It should work better now.


FIXING A MUFFLED NOTE

DISCLAIMER:  Ken Leonard again.  As before, I cooked this method up.  It may or may not be right, but it works for me.

Many 'trons have a few notes that are never crisp and clear.  They may be muffled.  What causes this?

It could be the tape head or head azimuth adjustment.  The fine folks at Streetly Electronics will gladly take your tape head block and check out the heads and adjust the head azimuth and replace any bad heads. 

The tape could be bad, or it could be the recording of that note.  Try all tracks on your tape or try another tape frame or set of tapes.

The felt pad on the pressure pad arm may be squashed.  This can happen if the keyboard was badly adjusted for a long time, and it sometimes results in two sounds on the tape sounding fine but one being muffled.  If the felt is squashed and stiff, remove the felt pad and replace it.  Silicon cement can be used to fasten the new felt to the pad arm, and you can obtain pieces of felt from International Piano Supply.

Assuming your keys are adjusted correctly to begin with, it could be the pressure pad arm.  Under the key is the pressure pad arm, and it can be moved forward and backward and even a little side to side.

For this exercise, we will assume your keys are adjusted pretty much correctly and the pad arms are straight and don't have any twists and the felt is intact (and not squashed).  You will want to inspect the physical pad arm to make sure it's OK, as the below adjustment probably won't help if a pad arm is toast--especially if the felt is gone.

To realign a pad arm:

  1. Remove the key retention bar from the top of the keyboard.
  2. Lift the front end of the keys and spread them right and left to isolate the key you would like to adjust.
  3. Move that key out of the way and loosen the screw holding the pad arm just enough so you can move the pad arm.
  4. Move the pad arm forward/backward and perhaps a little side to side if necessary.  After each movement, try playing the key to see how it sounds.  Gradually hone in on the placement of the pad arm that sounds best.
  5. Once you find where to locate the pad arm for the best sound, hold it in place and tighten the screw.
  6. Adjust the key normally if necessary.
  7. Put the keys back where they belong and put the retention bar back.

If this does not help, remove the pad arm and check the angles at which it is bent.  Compare the errant pad arm with a few of the "good ones" in the machine to make sure the angles are OK.

DON'T DO THIS.  A while ago I cooked up another method involving twisting the pad arm a little.  That may work in some bizarre situations, and it turned out that Sound Sales did this but took it to an extreme, ruining the pad arms (and changed music history in the process)---but it's not the way to go.  Get the azimuth done and move the pads around as mentioned above instead.


TOO MUCH NOISE!!!

Radio killed the Mellotron star.  Our friend Lee Richards has reported hearing massive amounts of radio/television signals in his 'tron.  Streetly has confirmed that it has happened before, usually when there's a Mellotron near a radio or TV transmission tower.  Well, if you look at the headblock, you've got 35 little antennas, so what do you expect!!!  Here are some ideas, some cheap, some not so...

bulletReorient your machine (turn it around, move it around).
bulletIf you have an SMS-4, do the low noise modification on the Mellotron site.
bulletThere's a coily piece of wire grounding the preamp to the frame.  Smooth the coils out (just stretch the wire until the coils have mostly disappeared).
bulletCoat the inside of the Mellotron's case entirely with aluminum foil and run a ground wire to the power supply housing.  This creates a Faraday cage inside the machine.
bulletGet a big blanket and cover it with foil.  Wrap your Mellotron in it, grounding it to the power supply housing.  It is possible that one of those "space blankets" (usually used by hikers and available at hiking/camping gear stores and even WalMart) could be pressed into service in this way.
bulletBuild a Faraday cage for your music room.  Available on the 'net you will find places that sell copper mesh designed to be put into rooms to shield RF (radio frequency) interference.  No, it's not cheap.
bulletMove!  :-)

Generally it's hit-and-miss.  You have to experiment and find what works best for you.  For #805 I uncoiled the coily wire, moved the machine around, and performed the low noise modification.  I also use a decent Monster Cable audio cable for it.  I haven't heard any radio signals in the machine for a while.

Noise/hiss/crackling when moving track selector.  Several people have complained about noise when changing the track selector or a rustling noise or hiss on one track but not others.  Jerry Korb and Bradley of Streetly developed a modification to address this:

A small insulating piece of plastic isolates the bolt holding the pin of the track selector.  Note that there is a sleeve in the bolt hole as well to keep the pin isolated from the track selector arm.

This modification is now done on all M400s that are in for work at Streetly and Jerry's place.  But it's simple, so you can easily do it yourself.

Screeching cable rot.  See the 'tronecdotes page for this one!  The copper in your Mellotron's cables is likely to have disintegrated by now, especially the cable from the head block to the preamp and the audio cable that runs out from the power supply to the output jack.  If the head block cable starts to short or go open, you will get nasty noise in he headphones---and you could magnetize your tape heads, thus erasing your tapes!  The obvious solution is to replace the cables.


CAN'T ADJUST THE PITCH

There can be any number of reasons for not being able to adjust the pitch on a Mellotron.

Low quality adjustment potentiometers on the SMS boards.  One cause of pitch control weirdness has come to light recently and deals with the quality of the potentiometers on SMS motor controllers.  Each motor controller has two potentiometers to adjust general speed and then stability.  Generally these are one-turn pots, and, unfortunately, they are not manufactured well and can cause a symptom where you cannot control the pitch on the machine using the pitch control knob.  Then if you go knocking about in the machine or disassemble/reassemble everything, it'll work.  This is a sure sign of a failing component.  Replace these pots on the SMS motor controllers with multi-turn high quality pots.  (Streetly is updating their future SMS motor controllers to use these multi-turn pots.)

Other possible causes:

bulletThe motor controller has failed in general and needs repair/replacement.  If a CMC-10, replace it.
bulletThe motor itself is bad
bulletBad or frayed wiring
bulletBad tach head
bulletTach head not aligned properly to the gear teeth, thus not picking up a strong enough signal to send to the motor controller
bulletPitch knob is loose and not actually turning the pitch control
bulletPitch control potentiometer is bad or loose

Other possible causes are broken wires, a bad tach head (or the tach head too far away from the gear wheel on the motor).

Adjusting the SMS boards:

The SMS boards are set from the factory, and in general should not be adjusted.  However if someone had monkeyed with the SMS board, you should know that there are three main adjustments.  With the connectors facing up:

bulletCenter speed control (the big knurled knob, lower right):  Usually the arrow is straight up.
bulletMotor voltage (potentiometer on the left):  Controls the voltage across the big capacitor on the left side of the board, generally 22V.
bulletMotor stability (potentiometer on the right):  Controls the voltage at the op amps; voltage can vary based on application.  The voltages here can change based on what motor is used and what version of SMS you have.

Recommendation:  Have the SMS adjusted by one of the Mellotron repair guys--they have all the test  points and voltages handy (I don't).  But if you're stuck and someone has dorked with your SMS anyway:

bulletPut the center speed control straight up.
bulletSet your 22V across the big capacitor on the left side of the board using the motor voltage potentiometer.
bulletAdjust the stability control just until the machine is stable (trial and error).


RECAP THE POWER SUPPLY

At some point those lovely big blue capacitors in the power supply will go up in smoke.  Replace.  Note that if you have an SMS controller, only two of the capacitors are used.  The others are electrically out of the circuit.

If you are looking at the bottom of the power supply and have the octal connectors facing down, the two capacitors on the right are the only two used if you have an SMS controller.


DEMAGNETIZING THE HEADS

Mellotrons should be maintained similarly to any tape recorder, including periodically demagnetizing the tape heads.  If you do not, a magnetic charge can build up on the heads over time, and this charge can cause dropouts on your tapes.  Unplugging the tape heads from your preamp and plugging them back in will magnetize the heads.  To avoid this, short the preamp output with a screwdriver before plugging the heads back in or permanently install a bleeder resistor across the preamp output.  "Screeching Cable Rot" can also cause your heads to be magnetized.  You must replace your head block cable.  See the 'tronectdotes page for info about that and other odd 'tron ailments.

To demagnetize the heads, get a demagnetizer.  Streetly what looks like a huge bulk tape eraser.  One or two passes over the heads, and they're done.  Most mortals get a simple wand demagnetizer.  I use a TEAC E-3 to demagnetize my Mellotrons' tape heads. 

After that there are two slightly different thoughts on demagnetizing the heads---do you leave the head block in or do you remove it?  You may want to review the text from the M400 manual.  See "Routine Maintenance" on Norm Leete's site.

As stated earlier:  How you maintain your Mellotron is up to you.

Here's how I demagnetize the heads using the TEAC:

  1. Leave the head block plugged in.  The 'tron should be powered off.
  2. Remove your tapes and put them away from the machine.
  3. Holding the demagnetizer far from the machine, switch the demagnetizer on.
  4. Bring the demagnetizer in straight to tape head #1.  Do not touch the tape head.
  5. Move the demagnetizer back and forth to sweep the entire tape head.
  6. Bring the demagnetizer straight back out.
  7. Repeat for each tape head.
  8. Holding the demagnetizer far from the machine, turn off the demagnetizer and put it away.
  9. Replace your tapes, power up your 'tron, and enjoy.

Because of the way the demagnetizer buzzes, you may want to put on some headphones and listen to some tunes during this process.  Else you'll wind up with a wooshy sound in your ears for a while after you've completed demagging the heads!